Learn how to permanently delete everything from your iPhone, iPad, and iPod directly from the device or using your Mac or Windows PC.
Want to sell your phone or hand it off to a family member? Or maybe you just want to start over with a clean slate? There are times when you might want to erase everything on your iPhone, iPad, or iPod touch.
You can erase all content and settings on your iPhone or iPad from the device itself or by using Finder on Mac or Apple Devices app/iTunes on Windows PC. Via these methods, you can wipe music, videos, photos, apps, messages, emails, contacts, accounts – everything from your device! Additionally, all your settings will reset completely.
Delete everything from your iPhone or iPad
This is arguably the quickest and easiest way to delete everything on your device. Note that the steps are the same regardless of the device, be it an iPhone, iPad, or iPod touch.
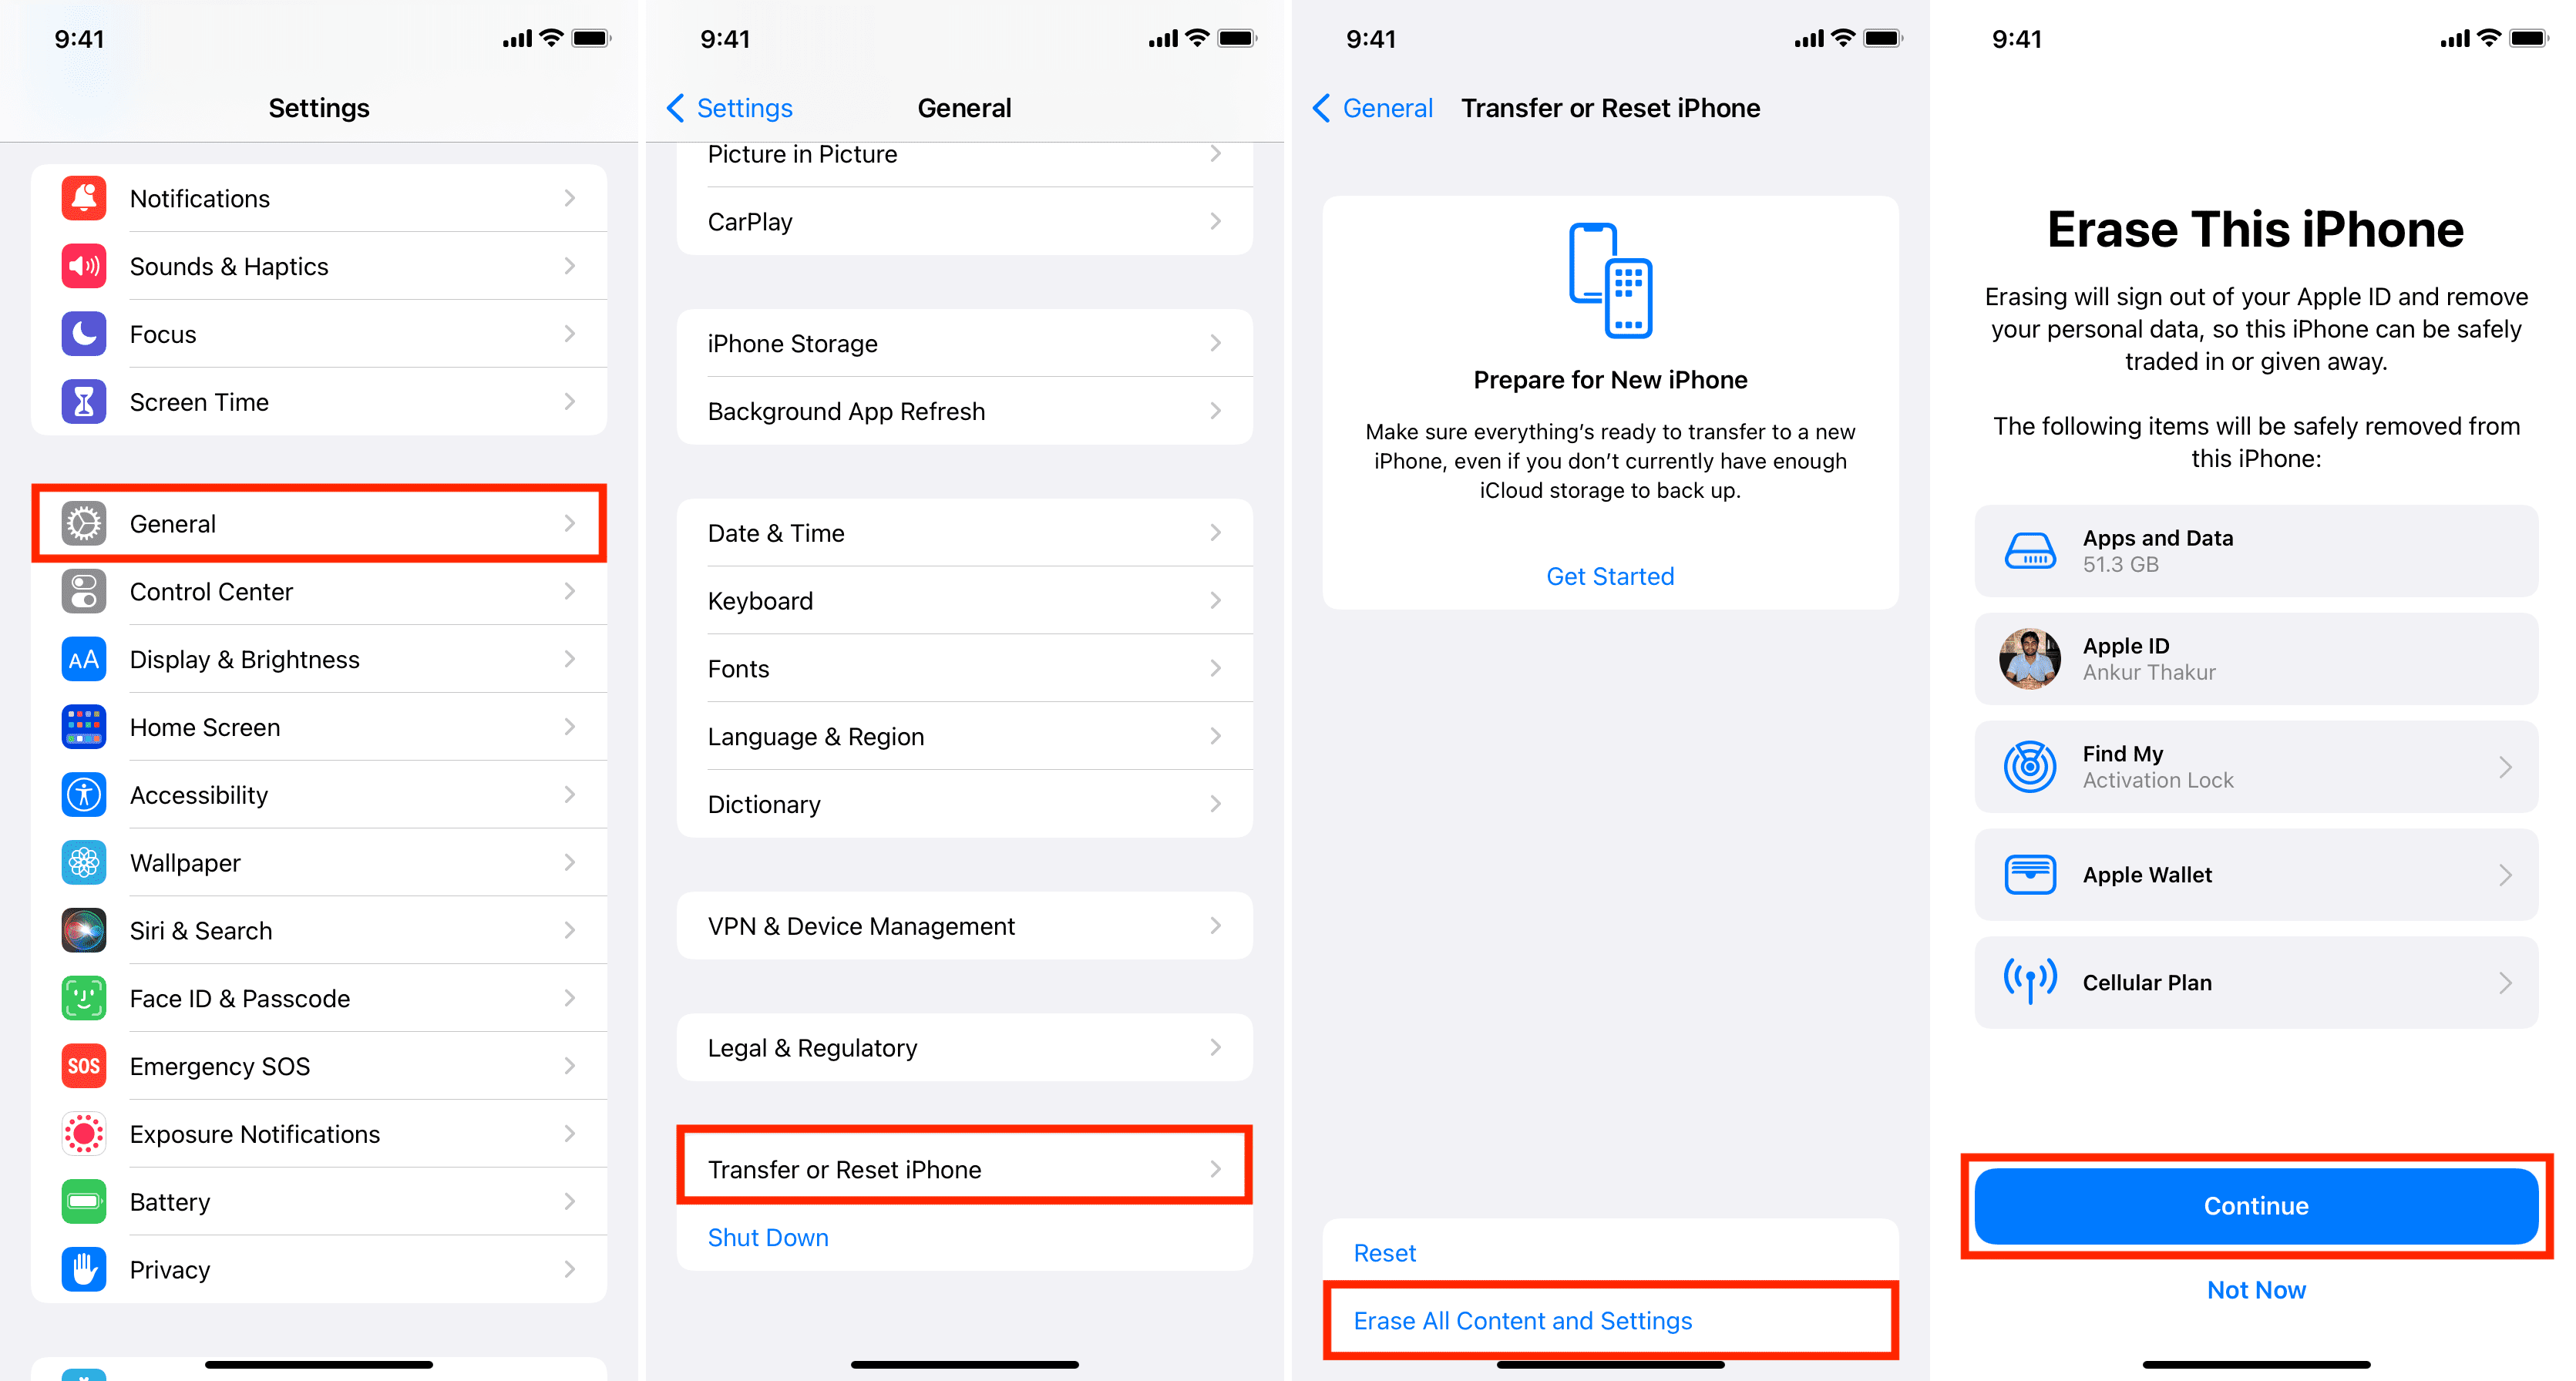
- Open the Settings app and go to General > Transfer or Reset iPhone.
- Tap Erase All Content and Settings.
- See the list of things that will be removed and tap Continue.
- Enter your iPhone passcode. A message will warn you that this will delete all media and data and reset all settings. Tap Erase iPhone to confirm.
- If you have Find My iPhone enabled, you’ll be asked to type in your Apple ID and password. Enter your password and tap Erase.
This will erase your device and remove it from your Apple account. The device will start the deletion process, which could take a few minutes. When done, your iPhone will be in the same state you found it when you first took it out of the box.
Erase everything on iPhone or iPad using a computer
Another method to remove everything on your iPhone is to do so using Finder on Mac or Apple Devices app/iTunes on Windows PC. We will use a Mac for the steps below, but the process is almost identical for Windows PC.
Before you get to the steps, turn off Find My on your iPhone or iPad by going to Settings > your name from the top > Find My > Find My iPhone/iPad. Once Find My is off, you can restore the device using your Mac or PC.
- Plug your iPhone or iPad into your computer using an appropriate cable. If a message appears asking for a passcode or to Trust this Computer, follow the prompts and allow that.
- Open Finder on Mac or Apple Devices app/iTunes on your Windows PC.
- Locate your iPhone or iPad. In Finder, it simply means clicking the iOS device name in the left sidebar.
- Click Restore iPhone from the General or Summary section.
- A message may appear asking if you first want to back up your device. If you do, select Back Up. If not, select Don’t Back Up. Of course, you can also back it up even if you don’t get a popup.
- You’ll then see a final warning that says something like: Are you sure you want to restore the iPhone to its factory settings? All of your media and other data will be erased. If you’re sure, click Restore to erase your phone and bring it to factory settings.

Note: Depending on your situation, iTunes might tell you that it has detected purchased content that has not been synced with iTunes. Click Continue. You will always be able to download your content for free later on if necessary.
Your computer will now start downloading the latest software available for your device. Once done, it’ll begin to restore your iPhone, which should take a few minutes.
After the restore completes, you’ll have the choice to set up your iPhone from a previous backup (if available) or as a new phone.
At this point, you can also choose not to restore a previous backup or set it up using your Apple ID. You can simply unplug the device from your computer and do whatever you want with it, such as selling it, sending it to Apple for trade-in, or giving it to a friend. Your friend can set up the device using their Apple ID.
Must read: