Learn how to resize multiple photos of different sizes at once on your Mac without downloading additional third-party apps or extensions.
As a blogger, I manipulate a lot of photos and screenshots. One of my daily routines involves altering the pixels of images we use on iDB to either reduce their size or make sure they fit right on the site.
There are many different ways you can quickly resize multiple images at once on your Mac. You can use an Automator workflow or download one of the many apps available to do that job. Or, if you want to quickly resize several images on the fly without too much trouble, you can simply follow one of the methods below.
Note that these tips work for popular image file formats like JPG/JPEG, PNG, and GIF.
Batch resize pictures on Mac using Preview
Preview is a free app from Apple that comes pre-installed on all Macs. It allows you to view and edit pictures and PDF.
1) Open Finder or your Desktop folder and select all the images you want to resize.
2) Right-click on them and select Open With > Preview.
3) In Preview, go to Edit > Select All from the top menu bar.
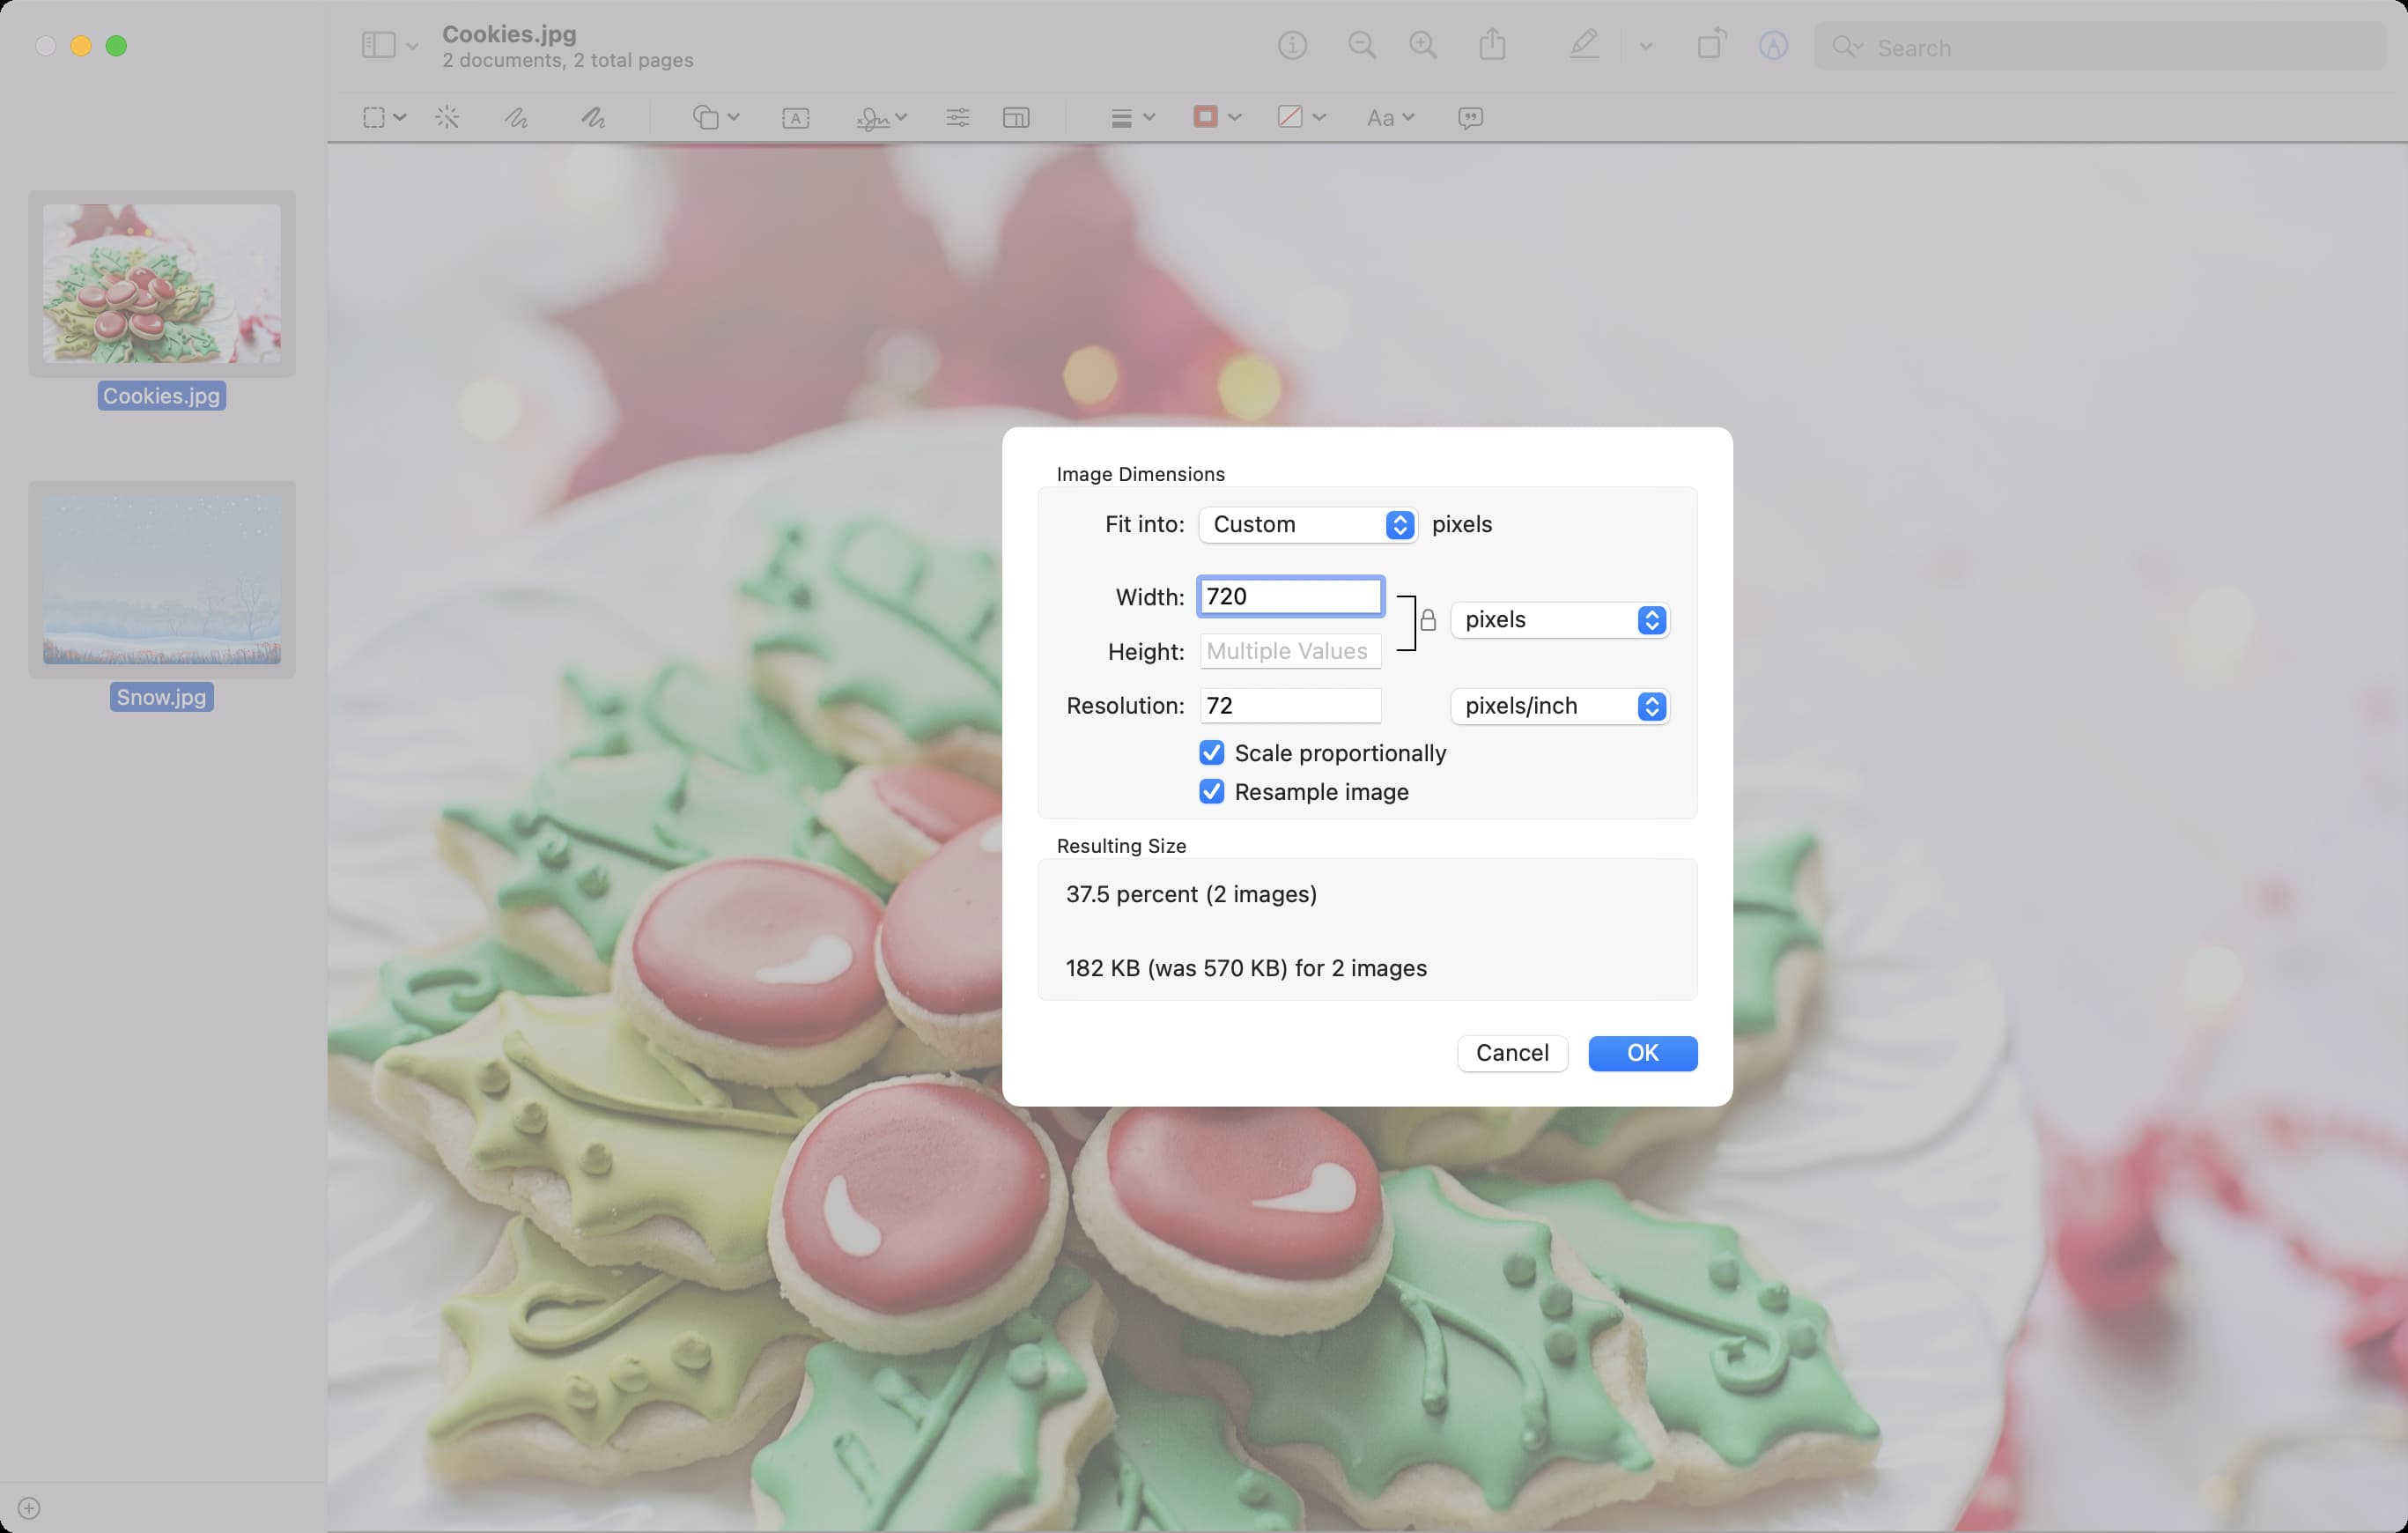
4) Once all images are selected, click Tools > Adjust Size.
5) Enter the width or height value to resize the photos to your liking. If you’re only going to resize the width, for example, make sure “Scale Proportionally” is selected. This will ensure that your images are proportionally resized. Take a minute to explore all the options here.
6) Click OK. The images are resized and saved to the original location by replacing the original files.
That’s all there is to it.
If you’re batch resizing images regularly, I’d also suggest the next three methods, which may prove to be more straightforward and will save you the trouble of repetitive tasks.
Also see: How to change a photo color and size using Preview on Mac
Use a shortcut to resize multiple photos on Mac
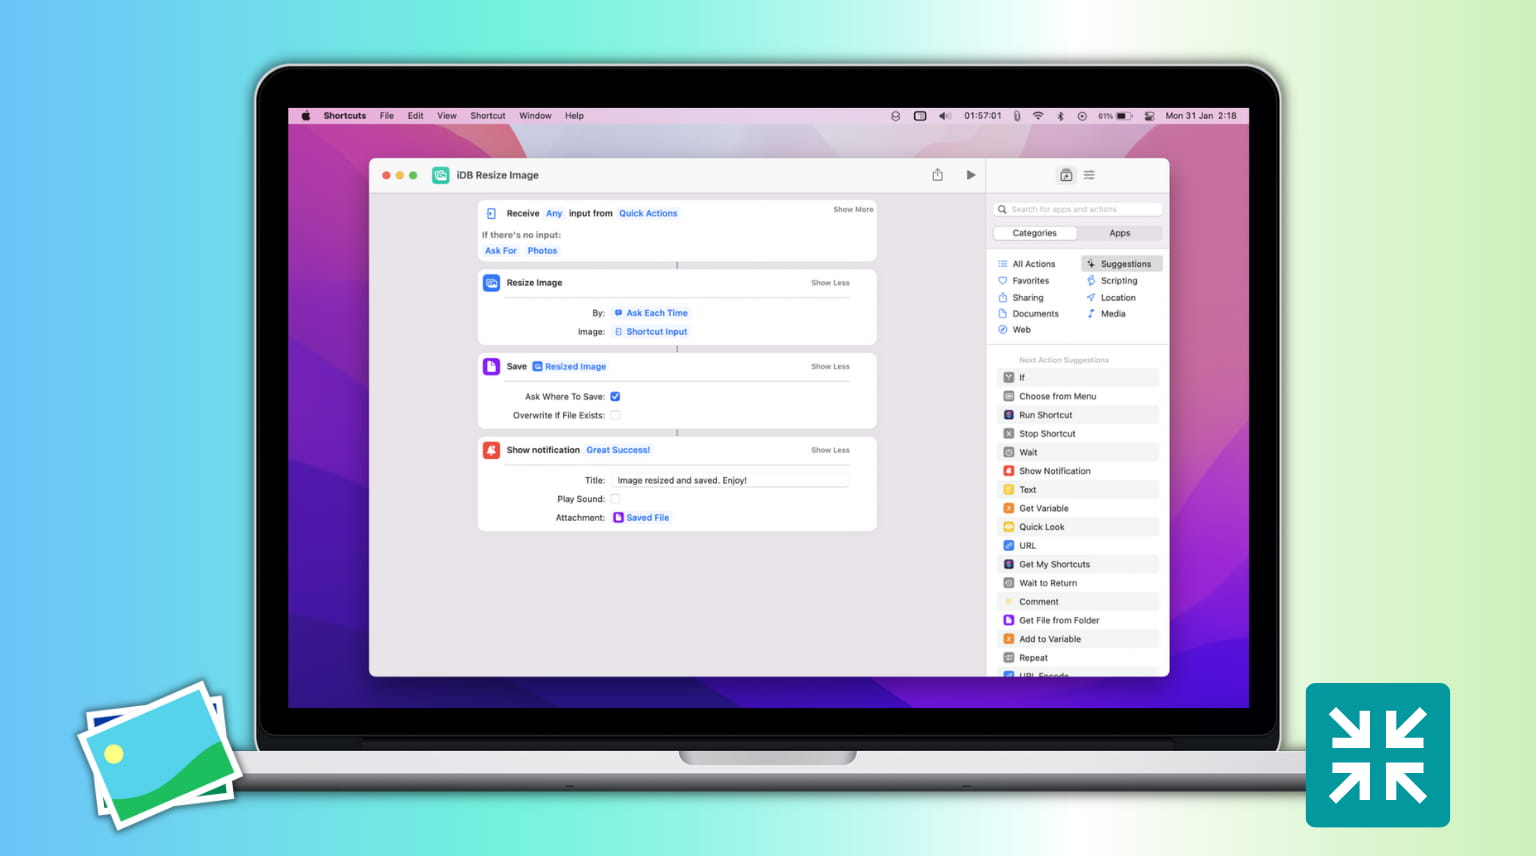
Just like its iOS counterpart, the Shortcuts app on macOS lets you do many things. All you need is to build a shortcut or get one from the internet or friends. To ensure you can get to work quickly, we have created a simple shortcut to resize one or more images quickly.
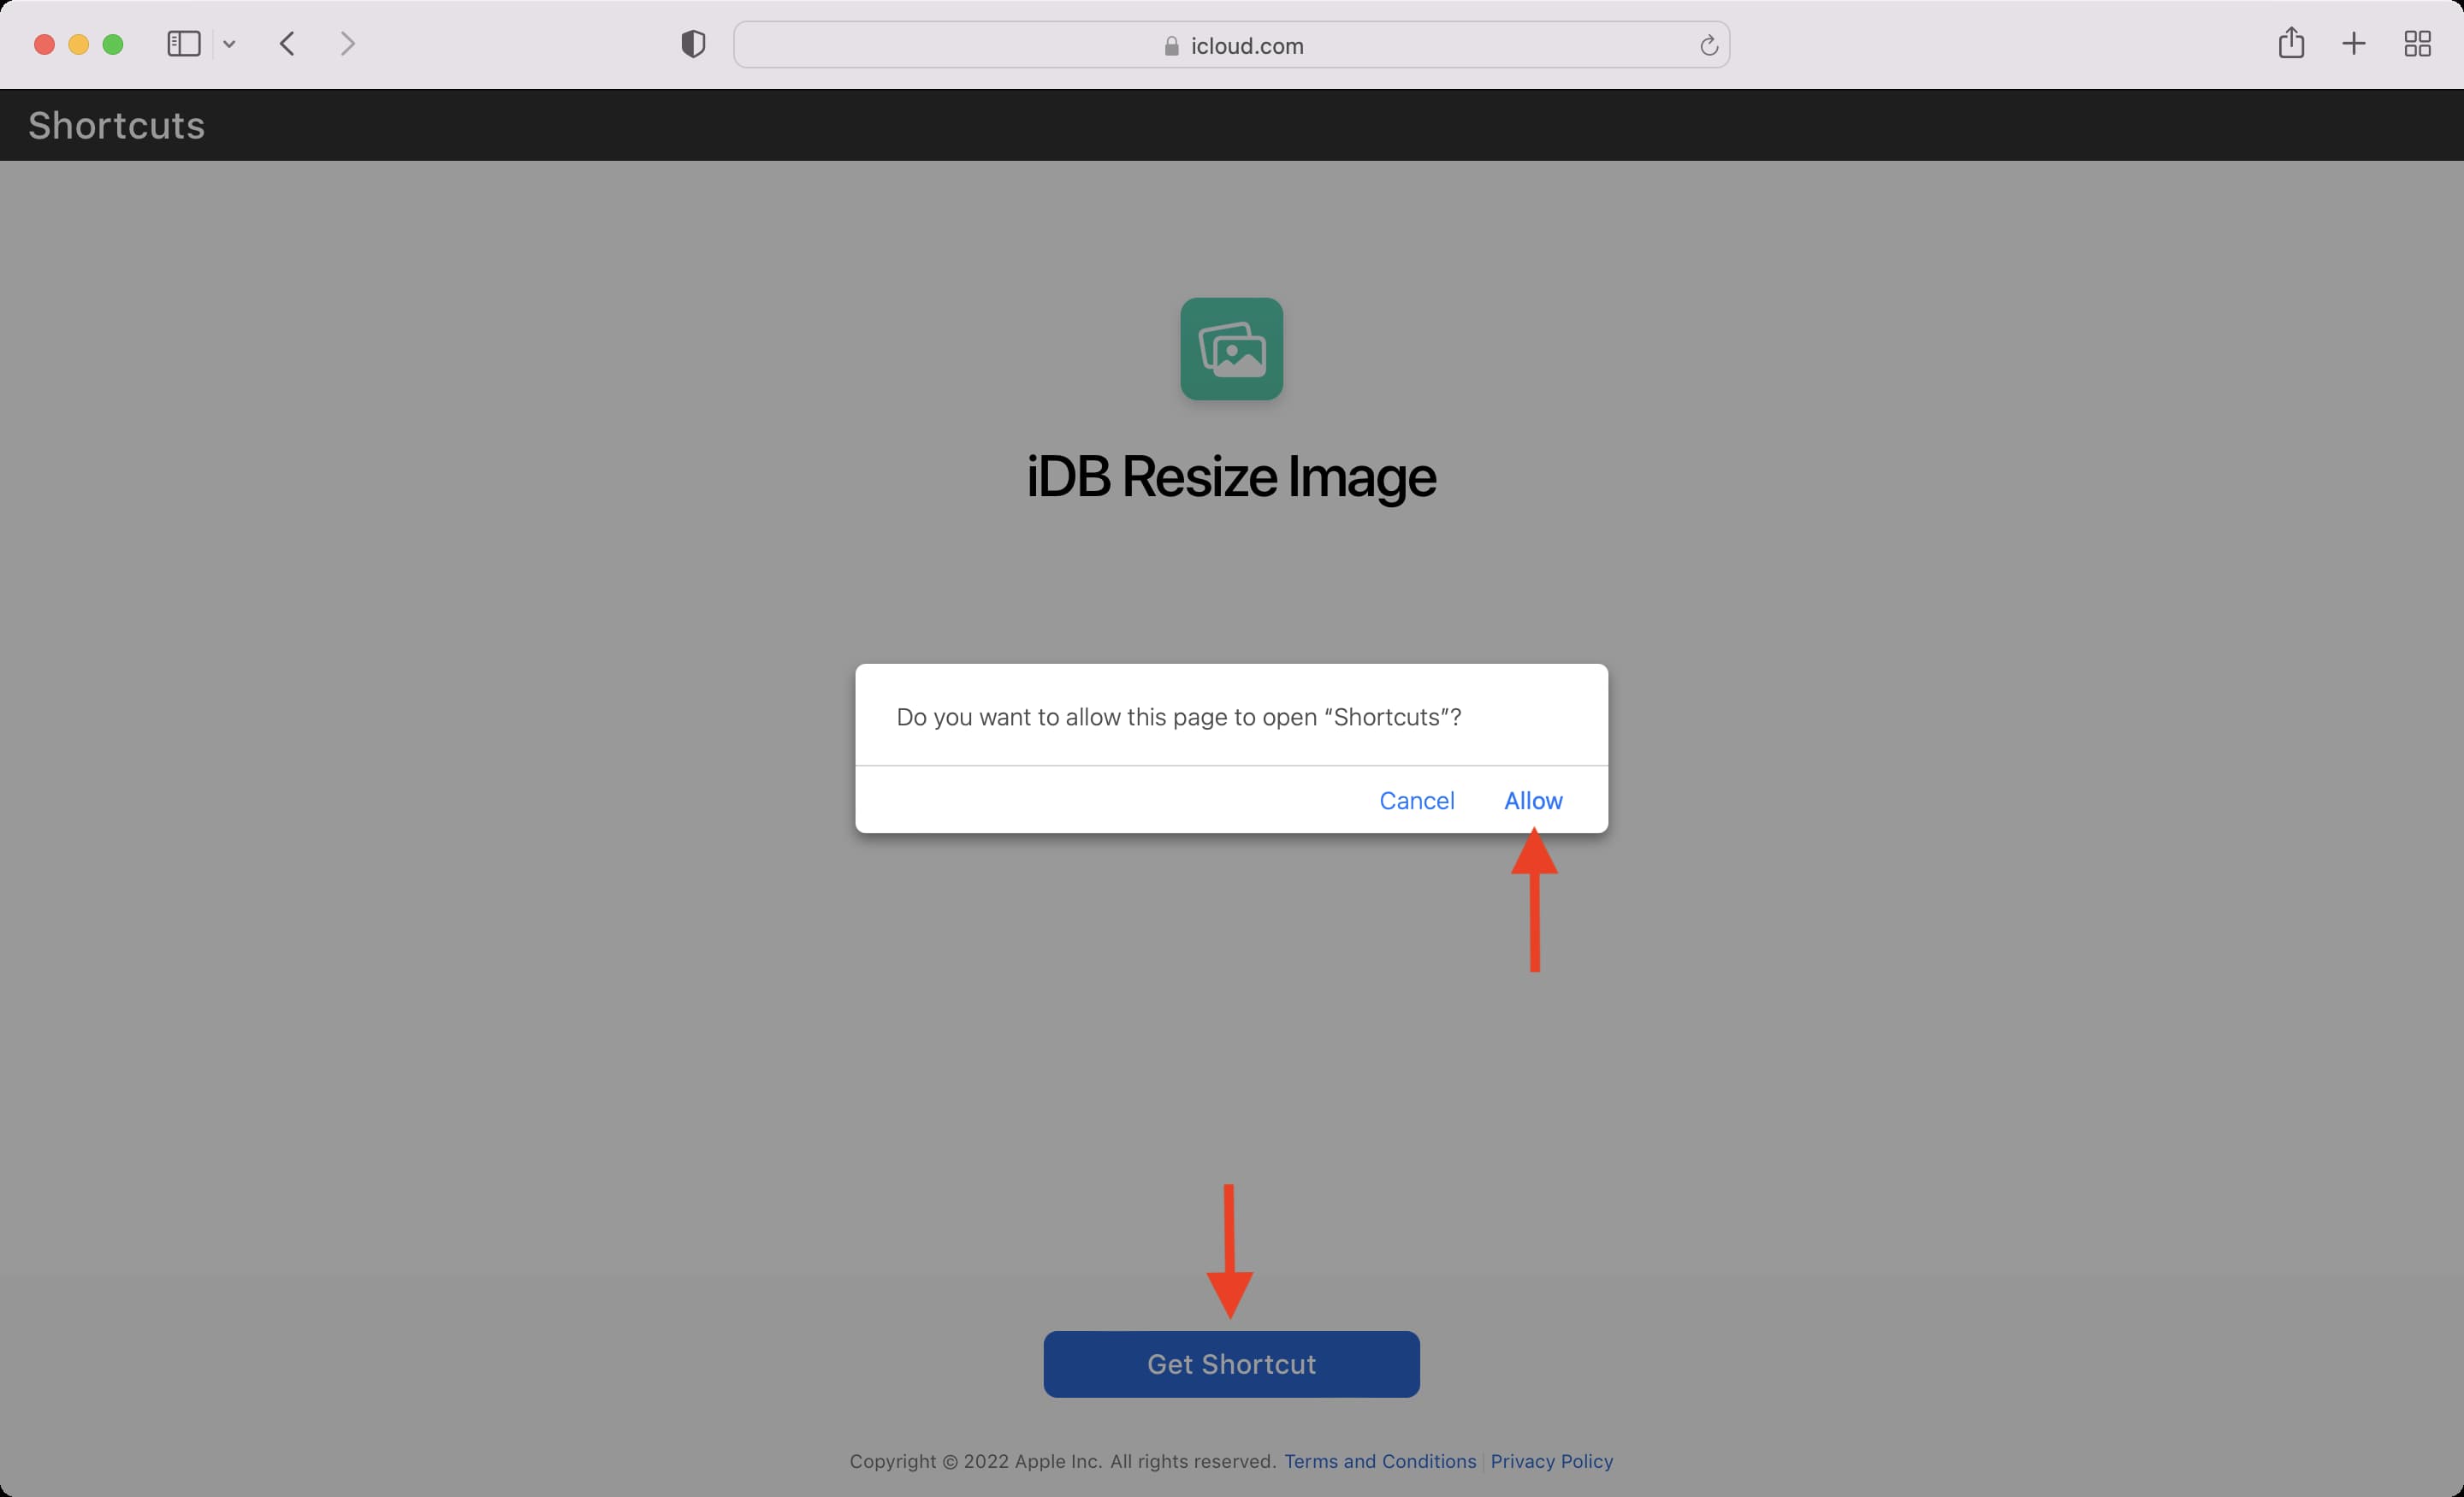
1) Go to the iDB Resize Image shortcut link and click Get Shortcut to add it to your Shortcuts app. Use Safari if you have trouble downloading it using other browsers.
2) Open the Shortcuts app and double-click this shortcut to open it.
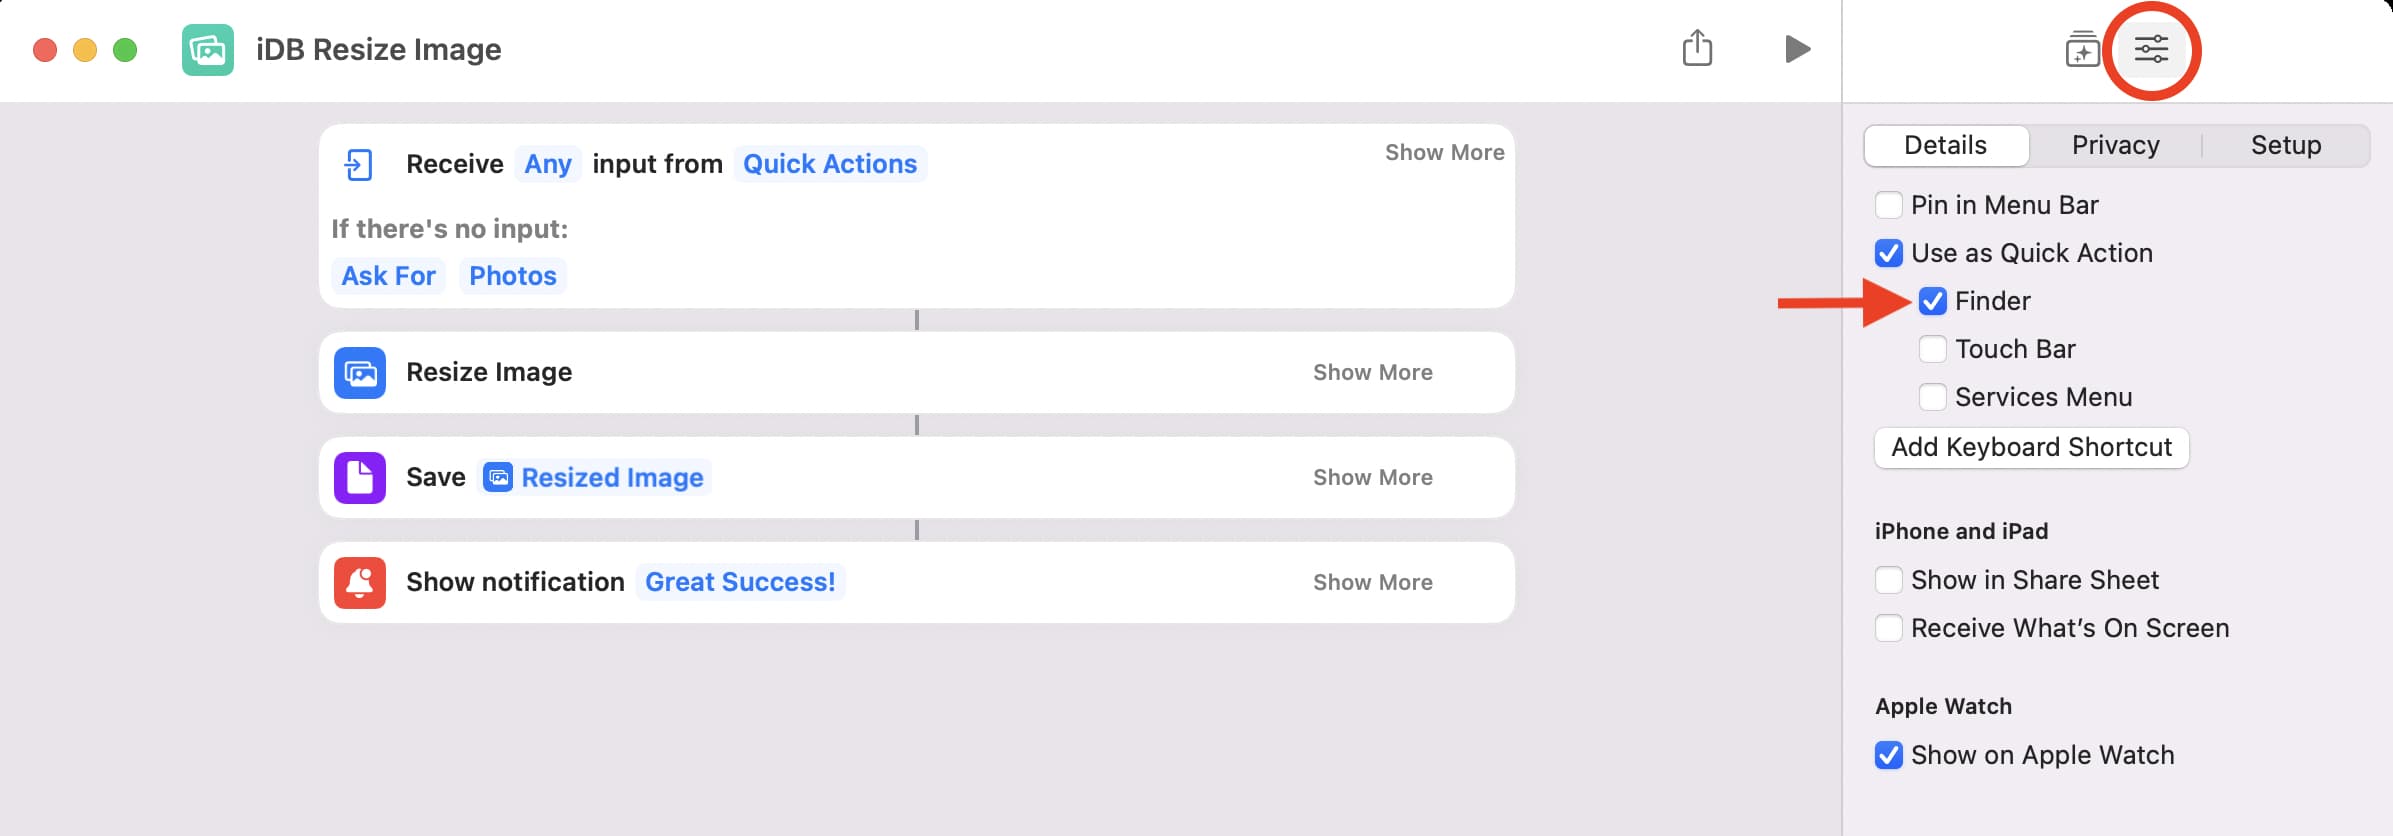
Now, click the info icon ⓘ or the settings icon from the top right and make sure Finder is checked under Use as Quick Action. Once done, close this screen by clicking the red traffic light button from the top left corner of the shortcut window.
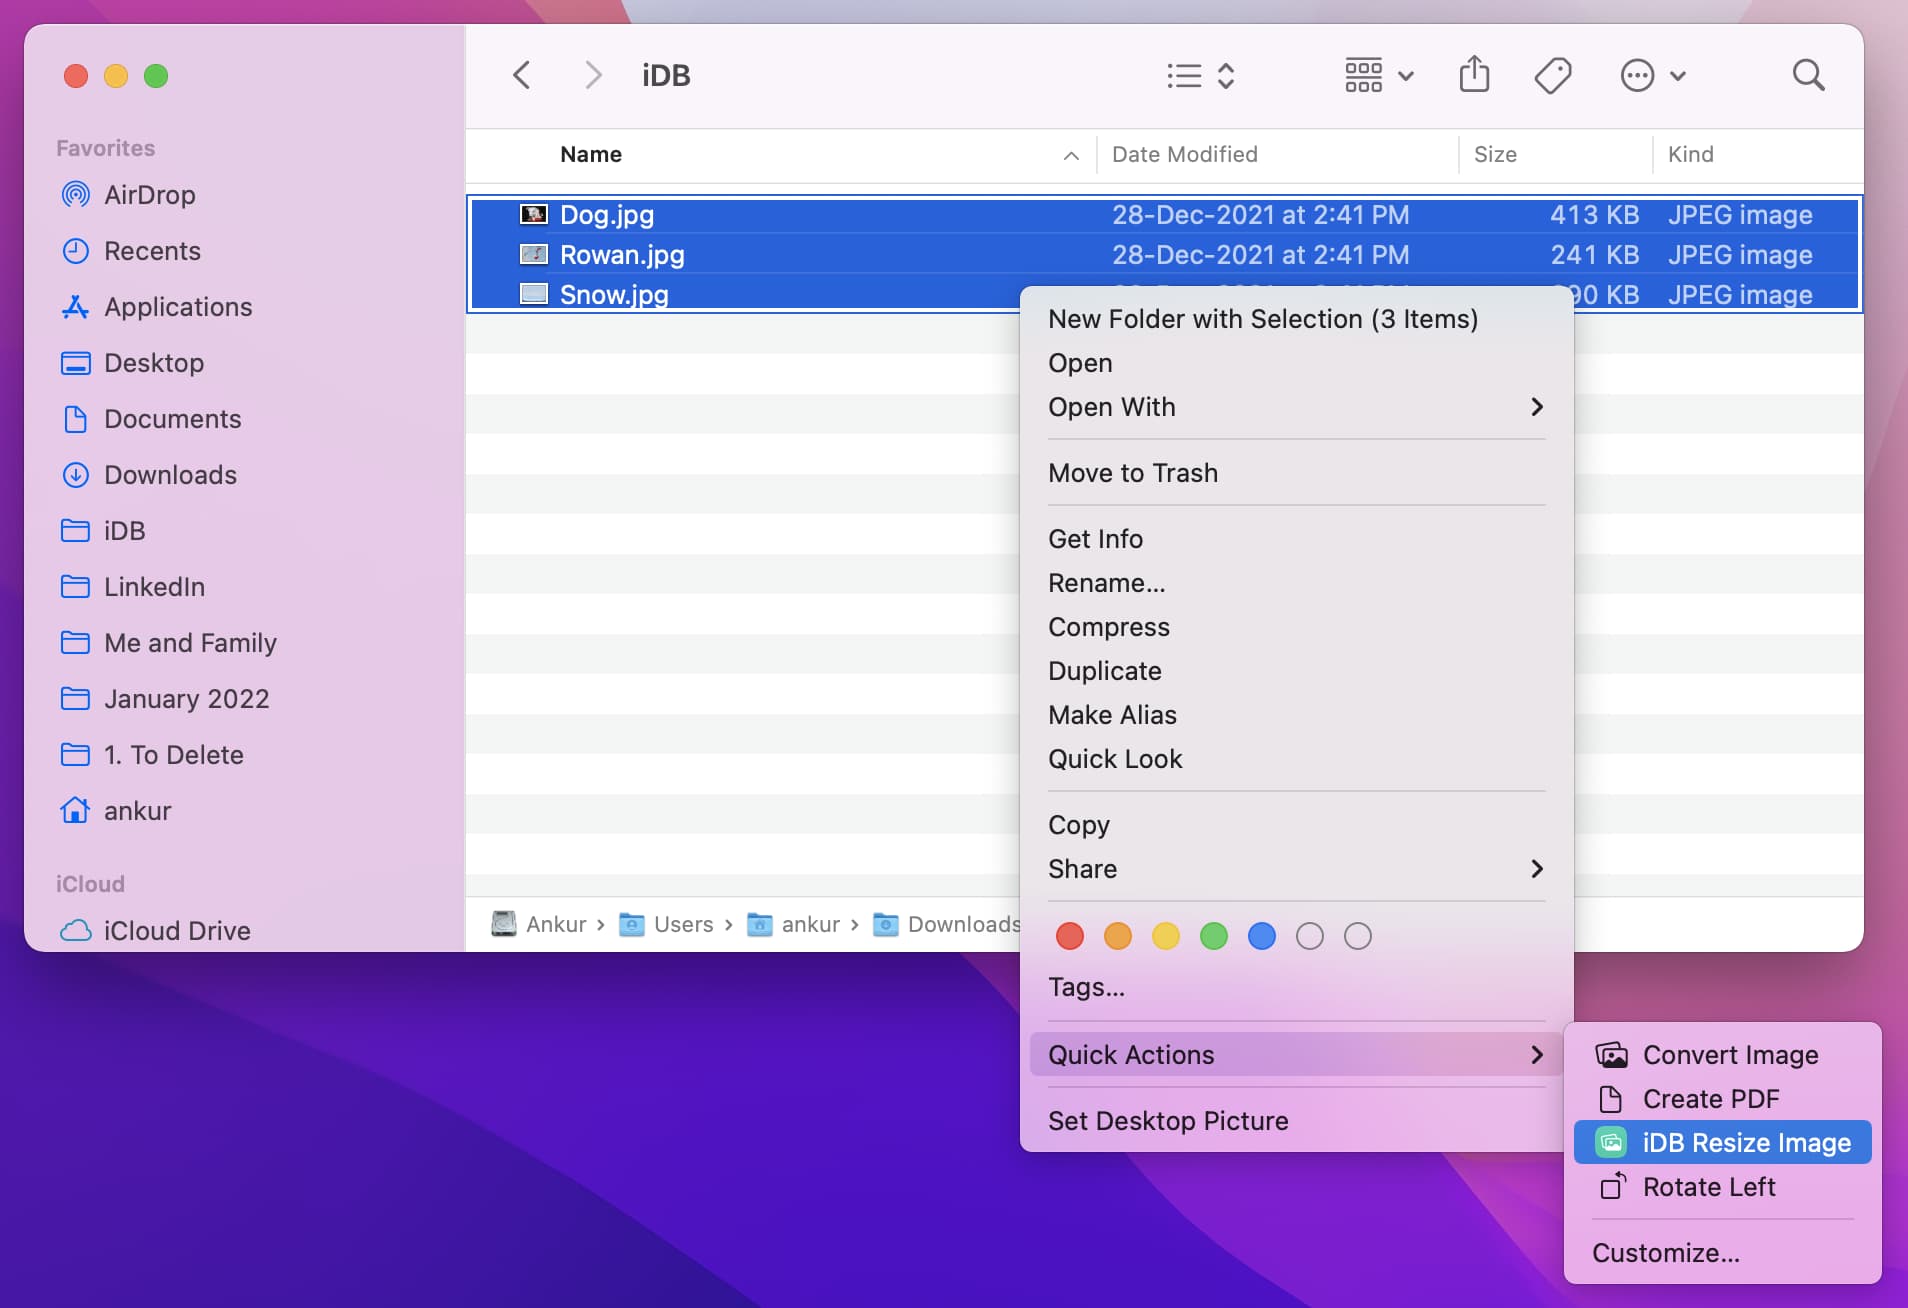
3) Right-click one or more selected images in the Finder. Then, pick Quick Action from the menu, followed by iDB Resize Image.
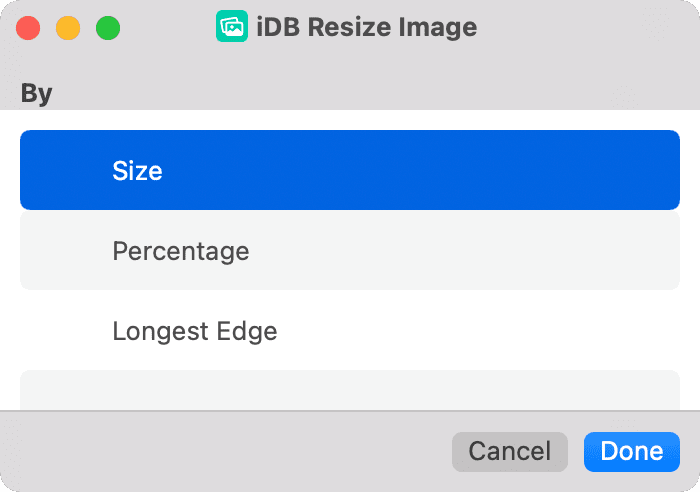
4) Choose how you want to resize the images — by Size, Percentage, or Longest Edge. Then, set the required parameters per your selection and click Done.
5) Select the location where you would like to export the resized image and hit Open.
The shortcut will successfully resize the image and save it to your Mac. You will get an alert saying, “Great Success!” once the resizing is complete.
Use image resizing websites
You can also change the photo width, height, and aspect ratio using online sites like iLoveImg.com. The entire process is quick and easy.
I have been using iLoveImg for multiple years to compress, convert, and resize screenshots and images. But note that you’re uploading the picture to a site’s server. So, proceed cautiously and avoid using this to resize your bank statements, ID cards, and other sensitive photos.
Bonus tip: Use the Compress Photos app
If you’re still looking for more options, check out the Compress Photos app that we built to reduce the image size and adjust its dimensions. However, like other iPhone apps, it works only on Macs with an Apple silicon chip.
The app is free to use with an optional paid upgrade. It does not upload photos to its server to compress them. The compression and resizing happen locally on the device, and you can use the app even when your iPhone, iPad, or Mac is not connected to the Internet. Furthermore, it doesn’t add an annoying watermark to the final image files, even in its free version.
1) Simply get the Compress Photos app from the Mac App Store and select pictures from the Photos app. If your images are in a Finder folder, drag them to the Photos app first.
2) Adjust the “Photo quality” and “Photo dimensions” as needed. If you only want to change the image dimensions without altering its quality, keep the quality slider to 100% and adjust the other slider appropriately.
3) Finally, click the Compress button. Once the process ends, open the newly created Compressed Photos album in Mac’s Photos app to view all the resized images.

Other tips to compress and resize media: